Wednesday, December 27, 2023

Dilled Potato Salad


A dear friend is moving away. His wife was part of our docent group at the museum.  We still call ourselves the Great 8 and fondly remember our beloved colleague Irene and the good times our group of eight shared. We have been together for twelve years, celebrating art and life with a passion. I invite the group to his farewell lunch. The camaraderie still reverberates as we spend the afternoon reminiscing with humorous anecdotes and a little sadness.

Some chicken and rice, baked salmon with green beans, eggplant pasta and this potato and dill salad. 

This salad is such a surprise. No drippy mayo. No mushy potato. Just a mouthful of fresh herbal flavors, a touch of tang from lemon and olives, some crunch from shallots and celery.... different and delicious. Try it.


DILLED POTATO SALAD

Adapted from The Mediterranean Dish

Serves 6


1 lb small potatoes (Fingerlings, Mini Gold or Red)

1 cup pitted mixed Olives 

1/2 cup diced Celery

2 Shallots, thinly sliced

1/2 cup Dill fronds, roughly chopped 

1/2 cup Parsley leaves, roughtly chopped

1/2 teaspoon Lemon paste (optional)

1/4 cup Red Wine Vinegar

1 Lemon, juiced

1 teaspoon Thyme leaves

1 teaspoon Dijon Mustard

1/2 teaspoon Garlic paste

1/4 cup extra virgin Olive Oil

1/4 teaspoon Kosher salt

Fresh ground Black Pepper


Start potatoes in cold water and cook till just tender. Drain and cool.

Whisk vinegar, lemon juice, thyme leaves, mustard, garlic, oil, salt and pepper in a bowl or jar.

Cut potatoes in half if small, or quarters if bigger. 

Place potatoes, celery, olives, shallots, dill and parsley in a bowl. 

Season potatoes with lemon paste, salt and pepper.

Pour dressing over potatoes. Mix gently. 

Refrigerate for 1/2 hour. 

Scatter dill fronds over potatoes and serve.


The warmth of genuine friendship, the sound of animated chatter and the clink of fork and spoon is life affirming!


Monday, December 18, 2023

Tilapia with Bok Choy and Sake

A resolution to eat fish twice a week has me scratching my head. My favorite fish recipes involve some kind of light frying so when I come across a baked fish I am thrilled. 

Tilapia filets sit atop browned bok choy. Braised in a sake bath, the fish roasts quickly. When done, the fish is dressed with a soy, garlic and vinegar sauce. Simpleness personified and yet bursting with flavor, the fish is delicious.


TILAPIA WITH BOKCHOY AND SAKE

Serves 2


2 Tilapia filets

1 teaspoon Canola Oil

4 large Bok Choy leaves

1/2 cup Sake or White Wine

3 teaspoon low sodium Soy Sauce

2 teaspoon Rice Vinegar

1 teaspoon Sesame Oil

1-2 Garlic cloves

1 Scallion

1/4 cup Cilantro leaves


Heat oven to 400F/200C.

Season tilapia with salt and pepper.


If bok choy leaves are large cut them in half. 

Heat oil in an ovenproof nonstick saucepan.

Add bok choy stems into the pan. Saute till stems turn light brown on the edges.

Add the leafy greens to the pan. Saute till they are limp about 2 minutes. 

Pour sake into the pan. 

Top with seasoned fish and bake for 10 minutes. 

While fish bakes make sauce by mixing soy, vinegar and sesame oil in a bowl. 

Mince garlic fine and add to sauce.

Chop cilantro leaves and add to the sauce. 

Slice scallion thinly and add to the sauce. 

Take fish out of the oven. 

Place bok choy on a plate. Top with fish filet. Spoon sake over fish. 

Dress fish generously with prepared sauce and enjoy.


We are astounded by this simple preparation. Carnivores become pescatarians!


Monday, December 11, 2023

Pistachio Sugar Cookies


Holiday love comes in diverse forms. Meaningful gestures, well intentioned help and edible gifts from my kitchen. They herald my love along with each bite. Meeting friends for lunch and handing over a little bag of goodies is my schtick. 

Sugar cookies made with pistachio powder have a charm of their own. A tangy lemon icing with more pistachio takes it over the top. What more damage can a little more butter and sugar do for you this December? Tis the season to be merry and eat another cookie!


PISTACHIO SUGAR COOKIES

Makes 25-30 cookies


2 1/2 cups All Purpose Flour

1/2 teaspoon Baking Powder

1/2 teaspoon Kosher Salt

1 cup Butter ( 2 sticks)

3/4 cup Sugar

1 Egg

1 teaspoon Vanilla Extract

1/2 cup Pistachios

ICING

1 cup Confectioner's Sugar

2 tablespoons Corn Syrup

2 tablespoons Lemon Juice

Pistachio Powder


Bring butter and egg to room temperature. Butter should be soft.

Grind pistachio till they are almost like powder. It is okay if you have small pieces in the mix. Keep 2 tablespoons aside in a bowl.

Whisk flour, baking powder and salt in a bowl.

Cream butter and sugar till light and fluffy about 2-3 minutes.  Use a stand mixer or hand mixer. 

Add egg and vanilla and beat till well mixed. 

Add flour mix. Beat on lowest speed till just combined. 

Add pistachio powder and beat dough for 20 seconds. 

Scrape the dough into a plastic bag. Flatten the dough and refrigerate for 1 hour. 

Heat oven to 350F/180C.

Scatter a little flour on your counter. 

Roll dough out till is is 1/4 inch thick. 

Use a 3" cutter to make the cookies. Wipe the cutter clean if the dough sticks to the cutter.  Lay the cookies on parchment or silicone lined baking sheets. 

Gather dough scraps, roll and cut again until you have used up all the dough. 

Bake cookies for 13 minutes. 

Cool cookies on a wire rack. 

Make the icing by mixing sugar, corn syrup and lemon juice. 

When cookies are cool, spoon the icing over cookies. 

Sprinkle pistachios over icing. 

Allow the  icing to set before you package the cookies. 

Enjoy!


The gift of giving is so much more than an action. It brings me  happiness as I parcel out the cookies.


Friday, December 8, 2023

Mutton Baffat


Some of my family's favorites are ones my Mum used to make. Over the years I have followed her recipes faithfully as it gives me immense joy to read a recipe written in her scrawl, to recreate the magic she shared with us. So on a cold evening, the idea of her easy to make baffat is tempting. 

Our family loves loves mutton or goat meat as it is know here in the US. Finding it used to be a chore, but ever since our local store carries it, it has been a staple at my table. 

Onions and mutton are sauteed with a masala paste. An addition of coconut milk  and veggies makes this baffat an Indian version of a meat and veggie stew. I cook this in my trusty pressure cooker. The younger generation uses the InstatPot. I am not a huge fan as the sauteeing is a huge part of the curry. If you plan to use the InstantPot, saute the curry separately in a saucepan and tip it in to the device before you add coconut milk. 

Call this a curry or a masala stew...Mum's baffat is dinner redolent with maternal love.


MUTTON BAFFAT

Serves 4


2 pounds Mutton or Goat Meat with bones

1 tablespoon Canola Oil

2 tablespoons Ghee

1 large Onion

15 Curry leaves

1 teaspoon Chile Powder

1/2 teaspoon Turmeric

Several grinds of Black pepper

4 teaspoons Paprika

1 teaspoon Cumin Powder

4 tablespoons Garlic Paste

1 14oz can Coconut Milk

5 Green Chiles

6 slices Ginger

3 Cinnamon Sticks

1 teaspoon Kosher Salt

4 Tablespoons Lime Juice

2 Potatoes

Handful of Green Beans

1 Carrot


Wash meat well. Let the water drain off. 

Chop onion into small dice. 

Mix chile powder, turmeric, black pepper, paprika, cumin and garlic paste in a bowl. Add a little water to make a thick paste. 

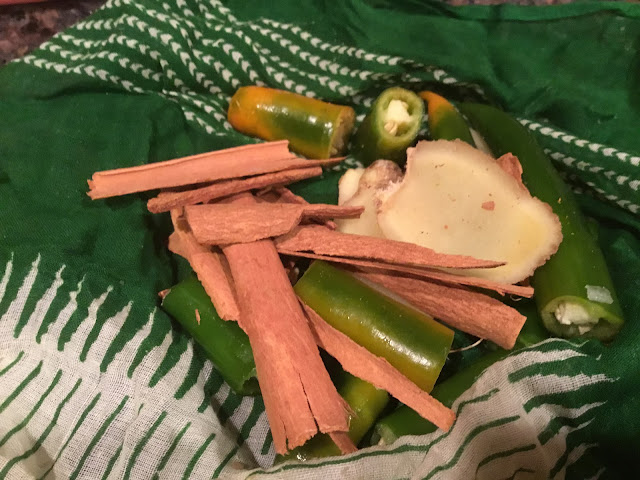
Cut out a 10"x 10" square of muslin or cheesecloth. Lay it on the counter. Cut green chiles into 2 inch chunks and place in the middle of the cloth. Top with ginger slices and cinnamon sticks. Gather the cloth and tie it off so it looks like a little bag. Keep aside. (The muslin cloth below is a piece of Mum's cotton sari. And no....the color does not run!!!!)


Peel potatoes and cut into large chunks.

Cut carrots into batons.

Cut green beans in half. 

Heat oil and ghee in a large pressure cooker. 

Add curry leaves and let them splutter for 10 seconds. 

Drop onions into oil and saute till tinged brown. 

Scrape masala into pan and saute for 2-3 minutes. 

Mutton goes into the pan. Saute well for 4-5 minutes. 

Add salt and saute. 

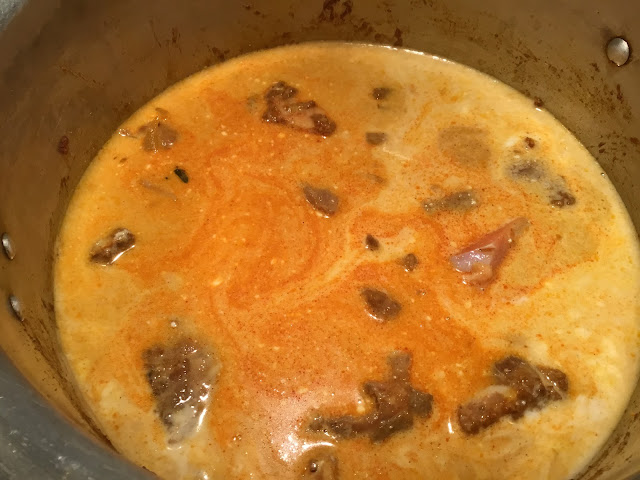
Pour coconut milk into the curry. Fill the can with water and add to the curry. 

Drop the bag of spices into curry. Push it in so it is submerged in the gravy.

Cover pressure cooker. Bring to a whistle, lower heat and cook till meat is done. Cooking times vary according to the quality of the meat. Test the meat with a knife. 

Add potatoes, carrot and green beans to curry, cover the pressure cooker and cook till veggie's are done.  

Pour lime juice into the curry and serve with rice or roti.


Hearty appetites devour the curry. Mum's legacy still reigns supreme.

Tuesday, November 28, 2023

Clams with Onions and Coconut


I have made these clams for more than a decade. I have been eating them even longer. We affectionately call them Neera's tisrya or clams. She helped my Mum in the kitchen. Her family recipe was so beloved that they graced our table every month. 

Bombay clams are tiny tiny crustaceans, yielding a bare nugget, albeit a tasty one. By contrast, the ones we get in the US are big and meaty. Draped with sauteed onions, fresh coconut and a raft of spices, they become flavorful, slightly chewy and above all very popular.


CLAMS WITH ONIONS AND COCONUT

Serves 4


20-30 Clams ( I used Quahogs)

2 large Onions

3-4 tablespoons Canola Oil

1/2 teaspoon Turmeric

1/2-1 teaspoon Chile Powder

1/2 teaspoon Garam Masala

1 teaspoon Sambhar Masala

1/2 cup grated fresh Coconut

1/2 teaspoon Kosher Salt

1/4 cup chopped Cilantro


Bring 4-6 cups of water to boil.

Add clams to water. Once they open up, strain the clams.

Twist off and discard the shell without the meat. 

Place shells with meat in a colander.

Rinse clams in cold water to get rid of all grit.

Slice onions thinly. 

Heat oil in a large saucepan. 

When it shimmers, add onions and saute till soft and translucent. 

Drop clams into saucepan. 

Sprinkle turmeric, chile powder, garam masala, sambhar masala, salt and coconut over clams. 

Stir gently to coat clams with spices. You do not want to dislodge clams in shells.

Add 1/4 cup water to pan, cover and cook over medium flame for 5 minutes. 

Sprinkle cilantro over clams and serve.


We all just clam up and eat! Neera's family recipe is forever my treasure.


Friday, November 10, 2023

Hara Chicken


There is a restaurant in Houston which shall remain nameless, that makes a divine green or hara chicken. Which my dear friend Madeleine brings whenever she meets us. Always under protest, as the owner has a  disagreeable reputation. To alleviate her reluctance to deal with him, I try my hand at recreating this chicken. 

The green comes from a blend of cilantro, green chiles, ginger, garlic, fennel and coriander seeds. Whisked yogurt adds sauciness. Boneless skinless chicken thighs outweigh chicken breasts any day. Simmered for a short bit, the chicken resembles the original for the most part. I leave out the onslaught of sliced green chiles!

A heap of garam kulchas are the perfect foil for the chicken.


HARA CHICKEN

Serves 2-4


1 pound boneless skinless Chicken Thighs

1 bunch Cilantro

3-4 Green Chiles

2 heaping tablespoons Ginger Garlic Paste

1 teaspoon Fennel seeds

1 teaspoon Coriander seeds

2 tablespoons Canola Oil

1/3 cup Yogurt

1/2 teaspoon Kosher Salt


Trim all fat from chicken. Cut chicken into bite size pieces.

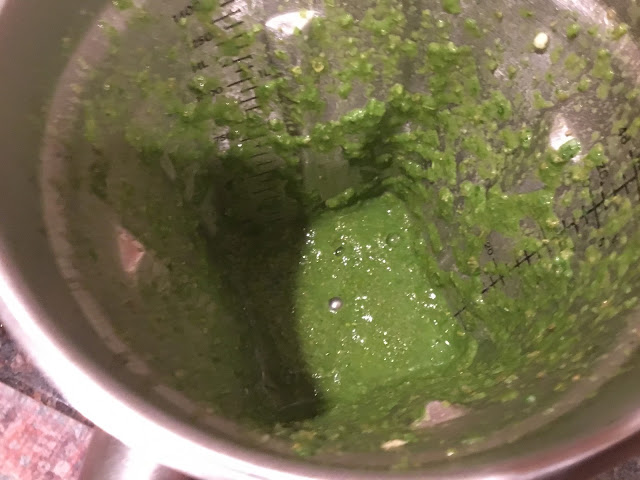
Blend cilantro, green chiles, ginger garlic paste, fennel and coriander seeds with a little water till you have a smooth paste.

Heat oil in a saucepan.

Scrape paste into oil and saute for 30 seconds.

Add whisked yogurt to the paste. Mix well so yogurt incorporates into the masala. Let it come to a simmer. 

Toss chicken into the pan. 

Season with salt. 

Simmer chicken for 20-30 minutes till cooked and you have a fairly thick sauce. Add more water if you need. The chicken gives off plenty or liquid as it cooks.

Serve hot with naan or rice.


I tell Madeleine that she doesn't have to make that dreaded trip to the nameless restaurant any more. No more rude repartee with the owner.  We are free to cook this anytime we want!